OpenAI SDK
Example Code
Examples from this module can be found on GitHub
Experimenting with the playground lets you see the power and possibility of Large Language Models and generative AI. To integrate that same power and possibility into your applications, you’ll need to access an API. GitHub Models exposes a REST API you can use to bring generative AI into your applications. The REST API emulates the official OpenAI API that you use to access the OpenAI LLMs. Being a REST API, you can access it from any programming language that supports HTTP calls. For popular languages OpenAI maintains SDKs to make that integration less difficult. SDKs exist for .NET, Go, Java, JavaScript, and the choice for this workshop, Python. As the GitHub Models API emulates the OpenAI API, you can use the OpenAI SDKs with GitHub Models with a few configuration changes.
Authenticating with GitHub Developer Tokens
Section titled “Authenticating with GitHub Developer Tokens”You’ll have to authenticate yourself with the OpenAI SDK for Python. On the OpenAI platform you would be provided with an API key that you would give the OpenAI client from the SDK to access the OpenAI models. With GitHub Models, you will generate a GitHub Developer Token which will serve the same purpose except that the models will be hosted on GitHub Models instead of the OpenAI platform.
To generate a GitHub Developer Token, go to [GitHub Apps]https://github.com/settings/apps). Expand the Personal Access Tokens section on the left sidebar and click Fine-grained tokens.
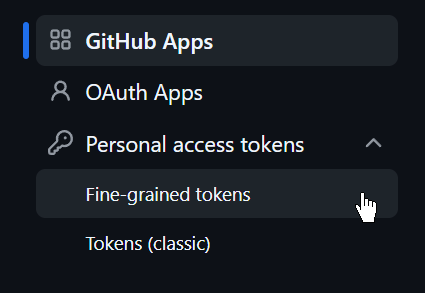
Click the green Generate new token button.
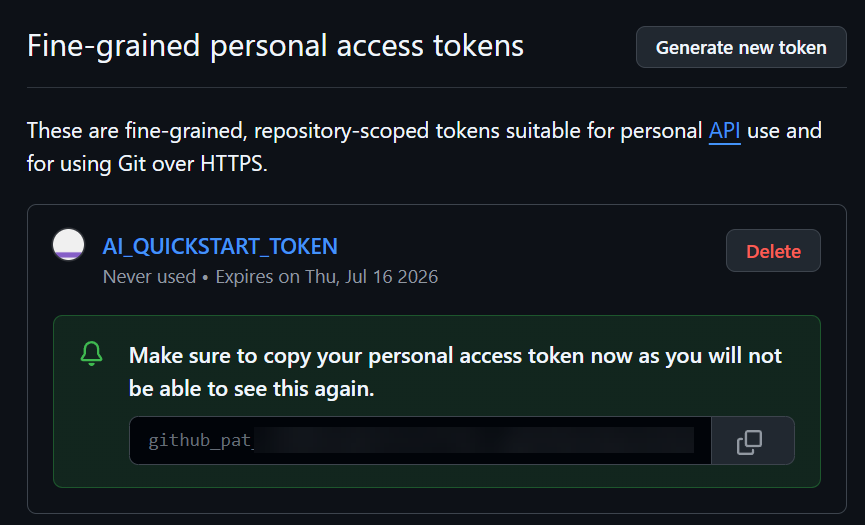
Give your token a name, I’ll call mine AI_QUICKSTART_TOKEN. You will need to pick another name as it must be globally unique.
You can change the Expiration date of the token. It is not recommended to set it to never expire.
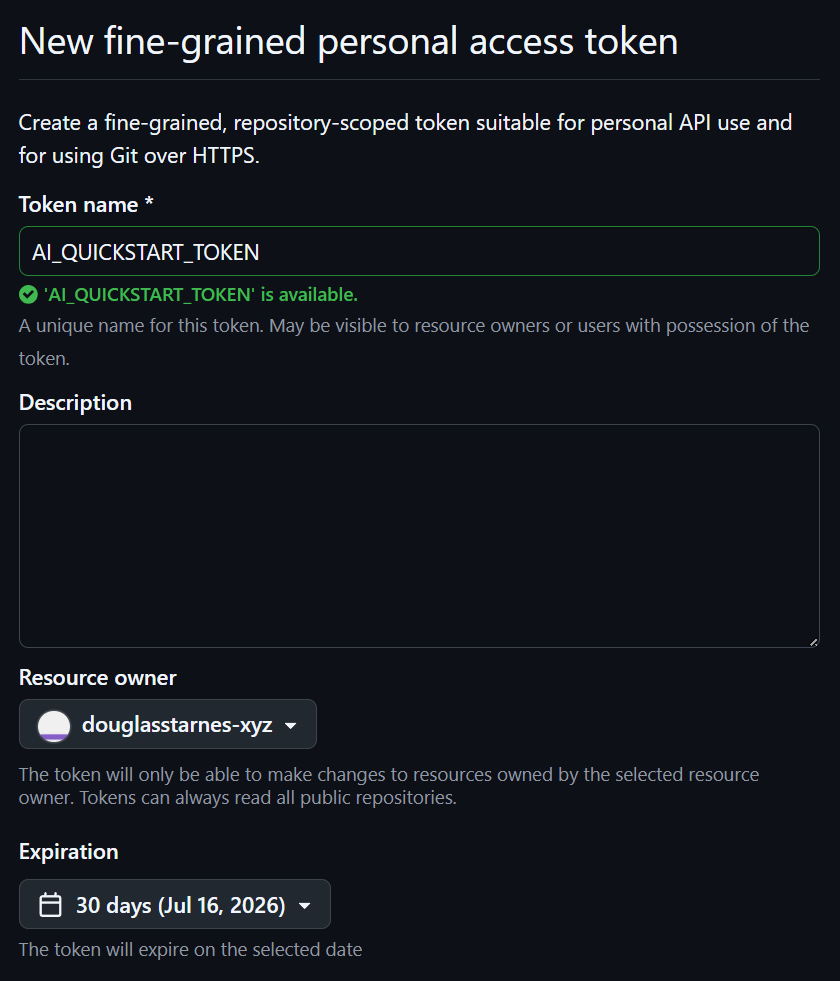
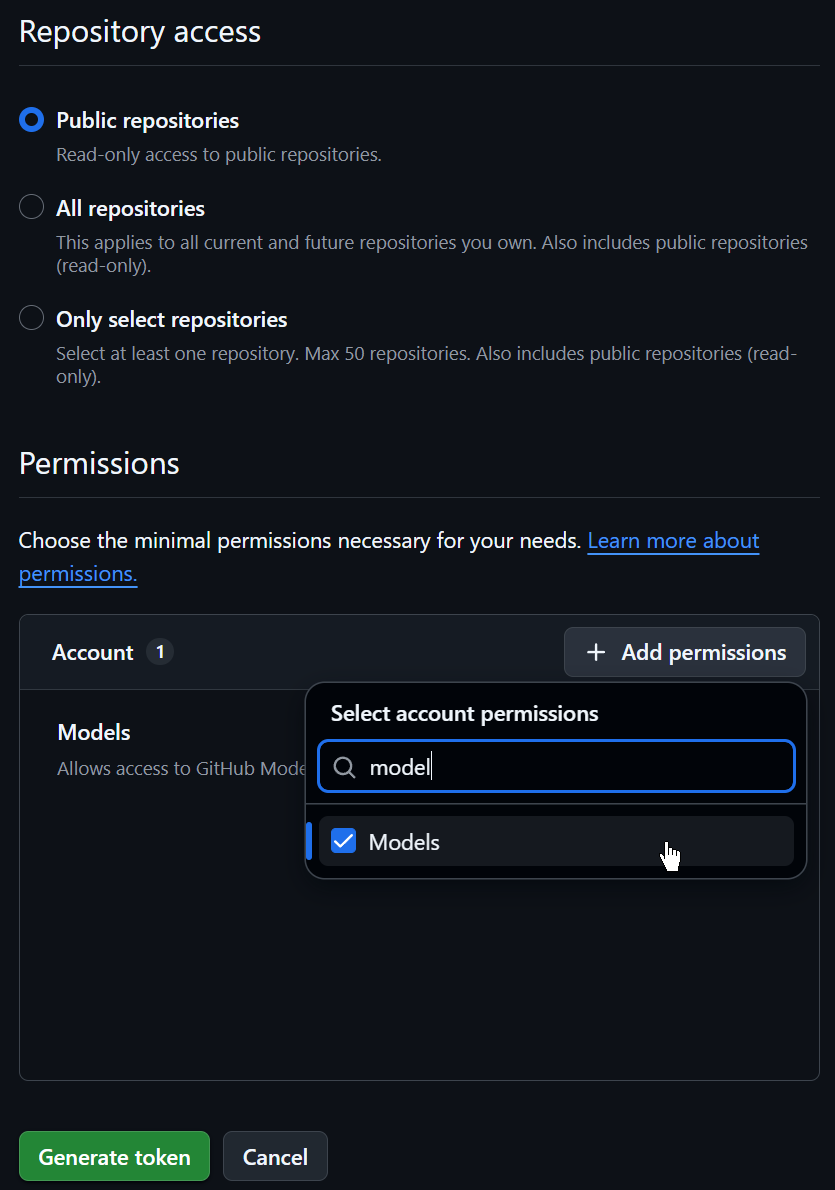
Scroll down to the Repository access section. Here you can restrict access to certain repositories. But for this demo, you can leave it set to Public repositories.
In the Permissions section, click the + Add permissions button. In the dropdown, search for and select GitHub Models. Then click the Generate token button.
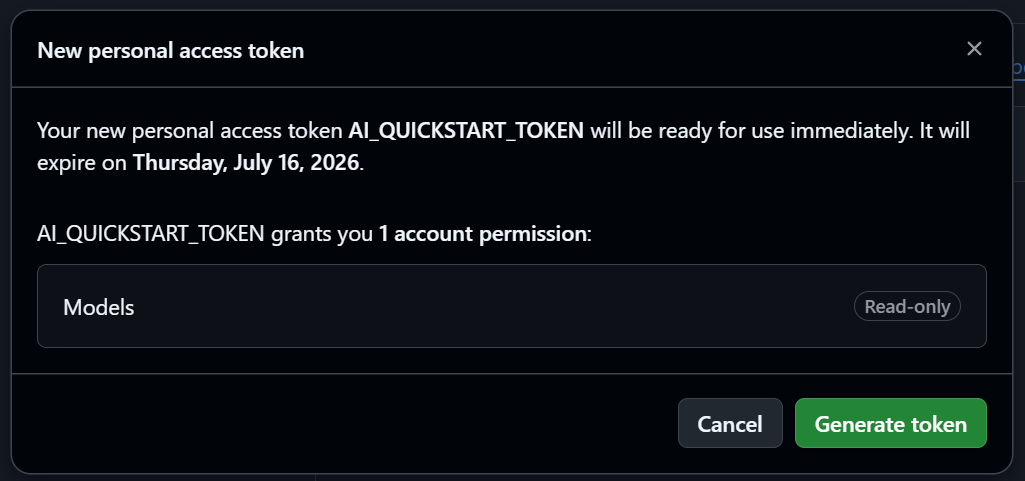
A popup will appear confirming you want to create a new token. Click the Generate token button in the popup.
You’ll see the details of your new token. It will start with github_pat and then some random characters (I’ve blurred mine out). You will need to immediately copy this token and save it somewhere secure because you won’t be able to retrieve the value again.
But where to save it?
GitHub Secrets
Section titled “GitHub Secrets”The best practice for storing sensitive values, such as a GitHub Developer Token, is to use an environment variable. On your local machine, the recommended way to set environment variables is to put then in a .env file and use the python-dotenv package to load them. Then you can access the token using the os module from the Python standard library. And this will work in a GitHub Codespace too. But there is a better way from a GitHub Codespace to access senstive values. It’s called GitHub Secrets.
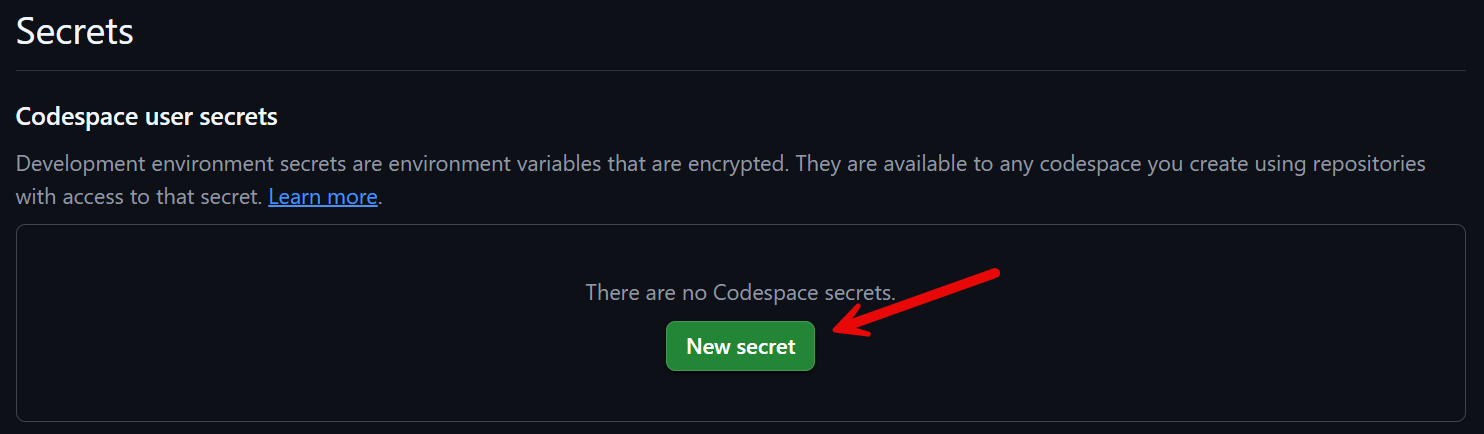
A value stored in GitHub Secrets is secured stored and accessible to your GitHub Codespace as an environment variable. To access GitHub Secrets go to your Codespaces settings in your GitHub account. Under the Secrets section, click the New secret button.
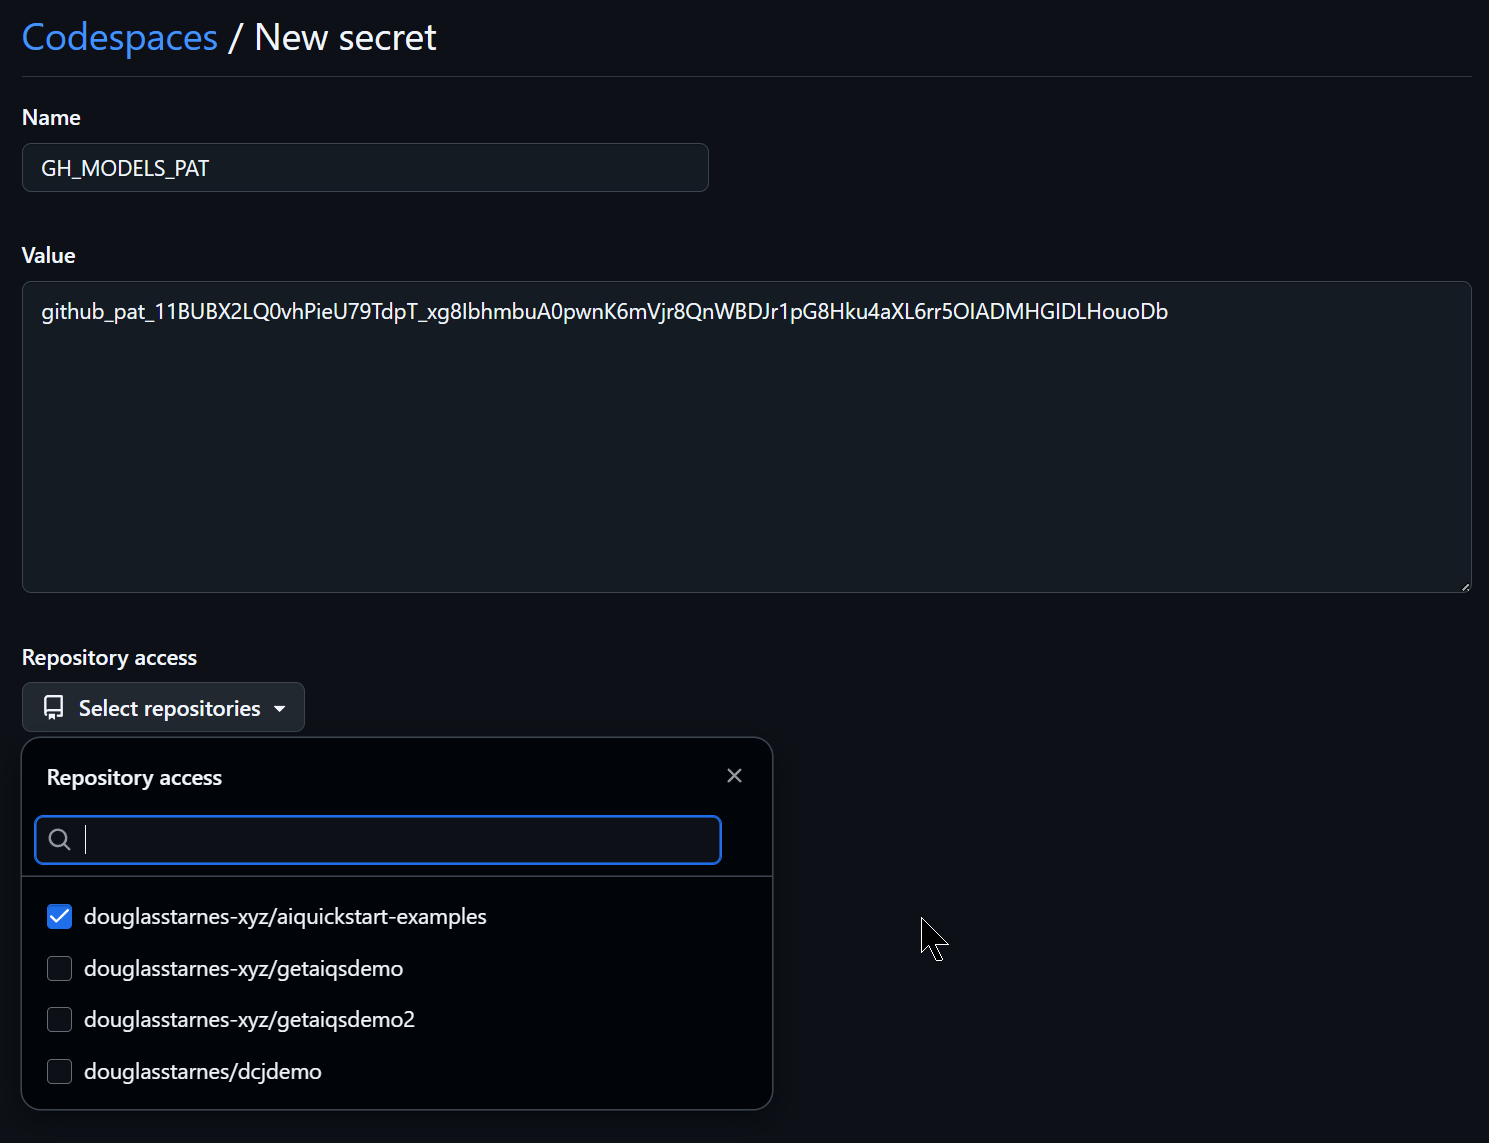
Give the secret a name, I’ll call mine GH_MODELS_PAT. Past the token copied from the previous step into the Value field. You’ll need to explicitly give permission for the secret to be used in your Codespace. Open the Respository access dropdown and select the repository with the fork of the samples repository you created in the previous module. After you close the dropdown, it will reveal a green Add secret button. Click that button to save the secret.
Note
Before the repository can access the secret, you will need to refresh the Codespace if you already have it open.
Accessing the Developer Token
Section titled “Accessing the Developer Token”In the 04_openai_sdk folder of the examples repository, create a new file called chat.py. At the top of the file, import the os module fromt he Python standard library.
import osNow you can use the getenv function in the os module to retrieve the value of the secret by passing it the name of the secret from the previous step.
GH_MODELS_PAT = os.getenv("GH_MODELS_PAT")As a sanity check, you can print the last four characters of the token.
print(f"GitHub Developer Token: ****{GH_MODELS_PAT[-4:]}")Run the file and you if see four random characters printed, you’re ready to write your first AI application!
Using the OpenAI SDK
Section titled “Using the OpenAI SDK”The OpenAI SDK for Python is distributed as a package just like the tiktoken package you installed in a previous module. To install the OpenAI SDK for Python, use pip to install the openai package.
$ pip install openaiIn chat.py, import the OpenAI client from the openai package.
from openai import OpenAIFor use with GitHub Models, the OpenAI client needs two keyword arguments. The first is base_url which is the endpoint to access the REST API for GitHub Models. This is always https://models.github.ai/inference. The second keyword argument is the api_key which the the GitHub Developer Token you retrieved in the presvious step. So you can create an instance of the OpenAI client like this:
client = OpenAI( base_url="https://models.github.ai/inference", api_key=GH_MODELS_PAT)Chatting via the OpenAI SDK
Section titled “Chatting via the OpenAI SDK”Recall that in the playground you used a system prompt to define how the model behaves. You can also send a system prompt to the OpenAI SDK with a message. Messages are constructed as Python dictionaries. The dictionary has two keys, role and content. For a system message, the role key has a value of system. The content key is the system prompt. I’ll use the system prompt from the previous module:
with open("../03_github_models/customer_service_prompt.txt", "r") as f:    customer_service_prompt = "".join(f.readlines())
system_message = {    "role": "system",    "content": customer_service_prompt}
You can create a message for the user prompt in the same way. Just set the role key to user.
user_message = { "role": "user", "content": "I was charged twice for the same item. What do I do?"}Now you can send the messages to the model using the client.chat.completions.create method. You pass the messages as a list of the dictionaries you just created. You’ll need to specify the model as well. To use GTP-4.1-mini on GitHub Models, set the model to openai/gpt-4.1-mini. Optionally you can set the temperature and top_p as well.
response = client.chat.completions.create( messages=[system_message, user_message], model="openai/gpt-4.1-mini", temperature=0.3, top_p=0.7,)This returns a response that can have multiple completions. By default, there is only one but it is still in a list so you’ll need to access at index 0 of the choices. The choice has a message which has content. Print the content to see the text of the generated response.
print(response.choices[0].message.content)